Diamond Co.
Diamond Co. / Guides
Guides

Urban Microgreens Starter Pack

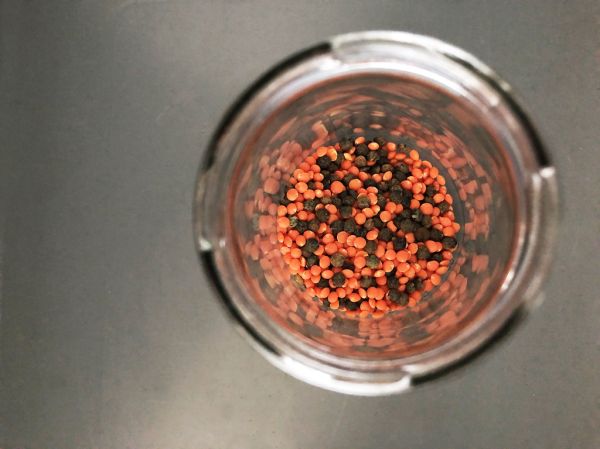
“the small things” by Rosmarie Voegtli · CC BY 2.0 via Openverse

Grow Fresh Greens in a Small Space – No Experience Needed

Urban gardening is easier than ever. Whether you have a balcony, a sunny windowsill, or just a spare kitchen counter, you can grow nutrient‑rich microgreens at home in a matter of days. The Urban Microgreens Starter Pack gives you everything you need to start, from a step‑by‑step guide to a short video walkthrough.


What’s Inside the Starter Pack

  • PDF Guide – A clear, concise manual that walks you through each stage of growing microgreens: choosing the right seeds, setting up your grow station, caring for seedlings, and harvesting for the best flavor and nutrition.
  • Short Video Tutorial – A 10‑minute visual guide that complements the PDF. It covers:
  • Setting up your growing surface
  • Watering and light requirements
  • Common troubleshooting tips
  • Harvesting and storage
  • Printable Checklist – Quick reference for daily tasks (watering, turning, checking light).
  • Resource List – Links to local seed suppliers, eco‑friendly grow kits, and community forums for ongoing support.

Who This Pack Is For

  • Urban Home Gardeners – Anyone living in an apartment or small house who wants fresh greens without a backyard.
  • Busy Professionals – Those who need a low‑maintenance, fast‑yield crop to add greens to lunches or meals.
  • Health & Wellness Enthusiasts – People interested in adding nutrient‑dense foods to their diet.
  • Sustainability Advocates – Those who want to reduce food miles and grow their own produce.

Share the Green

Feel like you’re making a difference? Use the referral widget below to invite friends, family, and fellow garden‑lovers. For every person who signs up using your link, we’ll add a small note of appreciation in our newsletter.


Frequently Asked Questions

  • Do I need a grow light?

No—if you have a south‑facing window that gets at least 4‑6 hours of direct sun, that’s enough for most microgreens.

  • Can I use the same seeds for multiple batches?

Yes, many seed packs come with enough for multiple crops. Just keep them in a cool, dry place.

  • What if my microgreens don’t look right?

Check the light exposure, watering schedule, and seed quality. Our guide includes troubleshooting tips.

  • Is this suitable for kids?

Absolutely! The process is safe and can be a fun, educational project for children.


Stay Updated

Sign up for future guides, tips, and community stories by leaving your email. We’ll keep you posted on new resources, seasonal seed releases, and more.


Look inside before you buy

Inside the product

  • 📌 Your Results in 7 Days
  • 📦 What’s Inside Your Free Starter Pack
  • 🌿 Sample Images
  • 💡 How to Get Started
  • 🔥 Trusted by Urban Gardeners
  • 📢 Share & Earn
  • 📅 Limited-Time Offer
  • 📜 Terms & Privacy

Sample from the actual product


**Harvest nutrient-dense superfoods in your kitchen—no garden needed.**
*Used by 1,200+ urban dwellers to save $30/month on groceries.*

[🚀 **Get Your Free Pack Now**] *(Limited-Time Offer – 48 Hours Only!)*

---

## 📌 Your Results in 7 Days
✅ **1 lb harvest** – enough for 20+ meals or salads.
✅ **$30 grocery savings** – microgreens cost pennies to grow vs. $5+ per ounce.
✅ **First harvest in 7 days** – ready to eat in a week.
✅ **Beginner-friendly** – step-by-day guide included.

---

## 📦 What’s Inside Your Free Starter Pack
1️⃣ **8-Page PDF Guide** – Covers:
   - [x] **3 beginner varieties** (radish, pea shoots, sunflower)
   - [x] **Equipment checklist** (what you need: $20 tray, $5 seeds, $10 LED light)
   - [x] **Day-by-day timeline** (watering, lighting, harvesting)
   - [x] **Troubleshooting** (common mistakes + fixes)

2️⃣ **2-Minute Video Tutorial** – Watch:
   - [🎥 Set up in 3 minutes](https://yourdomain.com/video-tutorial)

A short excerpt from the delivered content. Check the examples and format fit your needs.
Tips & notes

Stop doing this: Overwatering from the top

Pouring water directly onto microgreen seedlings compacts the medium and keeps seed coats moist, which is the fastest path to mold.

Do this instead: Bottom-water only

Add about a quarter-inch of water to the tray’s reservoir. Let the roots drink for 10–15 minutes, then pour out any remaining water. The soil stays consistently moist, but the greens stay dry and clean.

This simple shift cuts mold risk dramatically and saves time cleaning up later.

Common mistake: ignoring air circulation

Urban microgreens setups often live on countertops or in cabinets. Without airflow, moisture lingers on the soil and greens, which leads to mold growth and damp-off.

How to avoid it: Give your trays at least 10–15 cm of clearance from walls, and point a small fan on low for a few minutes each day—or simply open a window briefly. Air movement strengthens stems and keeps mold at bay. If mold appears, remove affected trays immediately and reduce watering frequency.

Water from the bottom, not the top

Pour water into the tray beneath your microgreens rather than spraying or pouring directly onto the greens. This keeps the stems dry, reduces mold risk, and encourages stronger root development. Aim for 1–2 inches of water, then drain after 10–15 minutes.

Mini checklist: 3 things that make or break urban microgreens

  1. Water from the bottom, not the top – After sowing, add water to the tray reservoir. Once roots anchor, top-watering traps moisture on leaves and invites mold. Empty any standing water after 10–15 minutes.
  1. Light distance trumps light intensity – Keep your source 2–4 inches above the soil. If stems are leggy and pale, the light is too far or too weak—lower it, don’t run it longer.
  1. Harvest at the cotyledon stage – Cut just above the soil line when the first true leaves just peek through. Waiting longer makes stems woody and reduces flavor/texture.

Quick check: If greens smell off or grow unevenly, it’s usually airflow or overwatering, not “bad seeds.”

Don't mist your microgreens into mush

A common mistake beginners make is keeping the surface constantly wet with frequent misting. This traps humidity against the stems and triggers mold (damping-off) before the greens even establish.

The fix: Water only the tray's bottom reservoir, or if topping water, do it once after sowing and then leave the lid off once germination starts. Let the growing medium just moist—not soggy—and air out the tray for a few minutes each day. Dry stems = healthy harvest.

Urban Microgreens Setup Checklist

  • Choose your tray – Shallow with drainage holes. Recycled takeout containers work if you drill ¼" holes.
  • Use the right medium – Skip garden soil. Opt for sterile seed-starting mix, coco coir, or hemp mats to prevent mold and ensure consistent moisture.
  • Seed density – Don’t overcrowd. Follow seed-specific ratios; too dense = poor airflow = rot.
  • Light from day 1 – Place under a sunny window or 2 inches from a cool-white LED for 12–16 hours. Avoid waiting for “true leaves” to start light exposure.
  • Bottom water only – Add water to the tray, not the surface. Prevents damping-off and keeps seeds in place.
### Water from the bottom, not the top
Pour a tablespoon of water into the tray’s base and let the medium soak it up for 10–15 minutes, then dump any excess. Keeping the stems dry is the single easiest way to prevent mold in tight indoor setups.

### The mistake that kills batches early
Leaving a dome or lid on past day 3. Once you see green tips, remove the cover. Trapped humidity + no airflow = mold before you harvest. Crack it open morning and night once germination starts.

### Quick 7-day checklist
- [ ] Day 1–3: Cover tray, keep in a warm spot, mist lightly only if the medium turns light brown
- [ ] Day 4: Remove cover, expose to indirect light
- [ ] Day 5–7: Mist once daily; harvest when cotyledons are fully open and before the first true leaves appear

Quick Tip: Keep Your Microgreens Dry and Potted

A common pitfall for new growers is over‑watering, especially when the trays sit under a grow light. Here’s a simple trick to keep your seedlings healthy:

  1. Use a Spray Bottle

Instead of a watering can, fill a spray bottle with room‑temperature water and mist the tray lightly.

  1. Let the Soil Dry Slightly

After spraying, leave the tray for 10–15 minutes. The moisture should soak in, but the surface will start to dry, indicating the right level.

  1. Cover with a Clear Plastic Sheet

Place a small, clear plastic cover on the tray to trap humidity without letting excess water accumulate.

  1. Check Daily

If the top of the soil feels damp, you’re fine. If it looks soggy, open the cover and let it dry out a bit before the next mist.

This simple routine helps prevent mold, ensures steady growth, and keeps your microgreens crisp—perfect for the fresh, urban garden you’re building!

More from Diamond Co.