Diamond Co.
Diamond Co. / Design packs
Design packs

Sourdough Starter Cheat Sheet Bundle

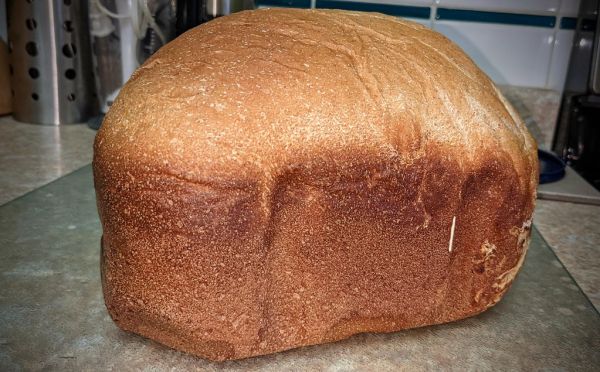
“A Loaf of Rye w/ Brad, the Sourdough Starter” by Dennis S. Hurd · CC BY 2.0 via Openverse

A compact collection of printable guides designed to take the guesswork out of sourdough starter care. Whether you're just starting out or looking to streamline your routine, these sheets give you a reliable reference for feeding, troubleshooting, and making the most of every bit of discard.

What’s Inside

  • Feeding schedule chart – simple ratios and timing for daily and weekly maintenance
  • Troubleshooting guide – identify common issues like hooch, off smells, and slow activity with quick solutions
  • Discard recipe ideas – three quick no-waste recipes using starter discard
  • Starter health checklist – visual cues to assess vitality at a glance
  • Flour conversion table – match feeding ratios to the type of flour you have on hand

Who It’s For

  • Home bakers who want a clear, repeatable feeding routine without constant internet searches
  • Beginners who feel overwhelmed by conflicting online advice and need a single trusted resource
  • Experienced sourdough makers looking for a quick-reference printable to keep on the fridge or in a notebook

How It Helps

Having a physical or digital sheet on hand means less time googling and more time baking. The guides are formatted for easy printing or screen viewing, so you can keep your starter on track no matter your kitchen setup.

Look inside before you buy

Inside the product

  • 📖 What’s Inside?
  • 💰 Price & Format
  • 🚀 Who’s This For?
  • 📢 Get It Now!
  • 🔄 Free Bonus: Starter Health Checklist
  • 📊 Why Trust This Guide?
  • 📢 Share the Love!
  • 📩 Questions?

Sample from the actual product

**Master Your Starter & Discard Recipes in Minutes**

---

## **📖 What’s Inside?**
Get instant access to:

✅ **Starter Health Checklist** – Quickly diagnose issues with this fill-in template:
- **Bubble Test:** [ ] Yes / [ ] No
- **Smell:** [ ] Sweet / [ ] Sour / [ ] Yeasty / [ ] Off (moldy)
- **Texture:** [ ] Smooth / [ ] Lumpy / [ ] Watery
- **Color:** [ ] Pale / [ ] Dark / [ ] Cloudy
- **Rise:** [ ] 100% / [ ] 50% / [ ] 0%
- **Notes:** _______________________________

✅ **Feeding Schedule Guide** – Customize for your flour type and season:
- **Flour Type:** [ ] Whole Wheat / [ ] Bread Flour / [ ] Rye / [ ] Spelt
- **Water Ratio:** [ ] 1:1 / [ ] 1:1.5 / [ ] 1:2
- **Feeding Frequency:** [ ] Daily / [ ] Every 2 Days / [ ] Weekly
- **Seasonal Adjustments:**
  - **Winter:** Reduce water by 10%
  - **Summer:** Increase water by 10%

✅ **3 Discard Recipes** – Turn your discard into delicious meals:
1. **Sourdough Pancakes**

A short excerpt from the delivered content. Check the examples and format fit your needs.

Tips & notes

🍞 Starter Ready? 3-Point Mini Checklist

Before baking, confirm your starter is active with this quick trio:

  1. Bubble surge: Visible domes or a frothy layer after a feed.
  2. Aroma: Pleasantly tangy, not paint-like or rotten.
  3. Volume: Doubled in size within 4–8 hours of feeding.

If any item feels off, skip the dough and feed again. Consistency beats rushing.

Get a printable version of this checklist (plus 2 discard recipes) in the Sourdough Starter Cheat Sheet Bundle.

# **🌱 The "Hidden" Sign Your Starter Is Ready (And It’s Not Bubbles)**

Most guides tell you to watch for bubbles, but the *real* telltale sign your starter is fully active? **It doubles in size within 4–6 hours after feeding—*without* needing a jar shake.****

### **Why This Matters**
- **Bubbles ≠ readiness.** A starter can bubble but still be sluggish (common with whole wheat or cold temps).
- **Doubling = consistency.** If it reliably doubles, it’s hungry for baking—not just fermentation.

### **How to Test It**
1. **Feed your starter** (1:1:1 ratio: starter/flour/water).
2. **Let it sit** at room temp (75–80°F / 24–27°C is ideal).
3. **Check at 4 hours.** If it’s doubled *and* jiggly (like yogurt), it’s ready.
4. **If not?** Try:
   - **Warmer spot** (e.g., oven with light on).
   - **Less water** (if it’s too runny).
   - **12-hour rest** (if it’s been fed too often).

### **Pro Tip**
Use this test **before baking**—a starter that doubles reliably = better flavor and rise. Skip the guesswork.

---
**Still struggling?** [Download the Starter Health Checklist](#) to diagnose faster.

🛑 Common Sourdough Starter Mistake: Tossing Your Starter at the First Sign of Hooch

Seeing a dark liquid on top? That's hooch, not mold. It means your starter is hungry, not dead.

What to do instead of tossing:

  • Stir it back in for a stronger, tangier flavor
  • Or pour it off if you prefer milder bread, then feed with equal parts flour and water
  • Feed within 12 hours if you're planning to bake

Pro tip: Keep a small container of "maintenance feed" in the fridge. When hooch appears, just refresh the feed—no need to start over.

✅ Quick action: Next time you see hooch, grab your flour and water. Your starter will thank you.

### **The "Feed Too Soon" Trap (And How to Fix It)**

**Mistake:** Adding fresh flour *before* your starter has fully digested the last feeding—usually within **4–6 hours** of the previous mix. This leads to:
- Slow fermentation (weak rise)
- Hooch buildup (gray liquid on top)
- A sour, vinegary flavor

**How to Avoid It:**
✅ **Wait for bubbles + 50% volume increase** (or 4–6 hours post-feed) before feeding again.
✅ **Discard 50–70%** of the starter before feeding—this keeps it active and prevents overfeeding.
✅ **Use the "float test":** Drop a spoonful in water. If it floats, it’s ready for another feed.

**Pro Tip:** If your starter smells *sharp* or looks sluggish, it’s begging for a **longer rest** (12+ hours) before feeding. Patience = better flavor.
### **The "Float Test" for Starter Readiness (When to Bake, When to Wait)**

**The Tip:**
Drop a small spoonful of your starter into a glass of water. If it **floats**, it’s ready to bake with—even if it doesn’t look *fully* bubbly or doubled. If it sinks, it needs more time (or flour/feed).

**Why It Works:**
- Floating = enough gas (CO₂) from fermentation to lift dough.
- Sinking = still working on breaking down starches/gluten.

**Pro Tip:**
Do this test **1–2 hours before your planned bake time**. If it floats, proceed; if not, feed it and test again in 30–60 minutes.

**Common Mistake:**
Assuming "looks active" = "ready to bake." A starter can look bubbly but still be dense inside—leading to flat or gummy bread. The float test cuts through the guesswork.

**Quick Checklist Before Baking:**
- [ ] Float test passed (or starter is visibly doubled + jiggly in 4–8 hours post-feed).
- [ ] Starter smells **slightly tangy, sweet, or yeasty** (not harsh, boozy, or rotten).
- [ ] Room temp is **70–78°F (21–26°C)**—cold slows fermentation; heat can overproof.

Quick Check: Is Your Starter Ready?

Before mixing dough, run through these three checks:

  • Bubbles: Active throughout the jar, not just on top
  • Aroma: Pleasantly tangy, not solvent-like or overly vinegary
  • Float test: A spoonful floats in room‑temperature water

If at least two are yes, it’s ready to use. If not, give it another feeding and wait 4–8 hours before testing again.

3 signs your starter is ready, no float test needed

  1. Peak activity: Bubbles throughout the jar, not just a skin on top.
  2. Texture: Smooth, slightly tacky, holding its shape — not watery or dry.
  3. Smell: Pleasantly tangy yeasty notes, not rotten, vinegary, or overwhelmingly alcoholic.

If it checks 2 of 3 after a feeding, it’s bake‑ready. Trust the texture and smell over the float test — it’s more reliable across flours and temperatures.

Keep your starter warm in winter

If your kitchen stays below 68°F (20°C), your starter may take twice as long to rise or seem inactive. Move it to the top of the fridge, near a pilot light, or inside a turned-off oven with a bowl of warm water. Consistency matters more than perfect temperature—a stable cool spot is better than fluctuating warmth.

Stop using hot water to “boost” your starter

If your feed water feels hot to the touch, it’s likely too warm. Water above ~100°F (38°C) can weaken or kill the wild yeast and bacteria in your starter, leading to slow rises or a flat loaf.

Instead: Use lukewarm water, roughly 80–85°F (27–29°C). Think “comfortable bath temperature.” This keeps the culture active without stress.

A steady temperature means more predictable fermentation and consistent results day to day.

How to Tell Your Starter Is at Peak Activity

Don't rely on time alone. Use these three quick checks instead:

  1. Volume – It should have risen 2–3x its original size and hold that height for at least 30 minutes before starting to fall.
  1. Surface texture – Look for a slightly domed, pebbled surface. If it looks flat or liquidy, it’s not quite there.
  1. The float test – Drop a small spoonful into a glass of water. If it floats, it’s ripe and ready for bread. If it sinks, give it another feeding and wait.

Temperature note: Starter activity slows below 70°F (21°C). If your kitchen is cool, cover the jar with a towel and place it on top of the refrigerator or inside the oven with the light on for a steady warm spot.

### Quick Starter Health Check

**Smell:** Should be pleasantly tangy, like yogurt or cider. Acetone or vinegar notes mean it’s too acidic; no smell suggests dormancy.

**Texture:** The surface should be slightly domed and tacky. A dry crust or excessive hooch liquid on top signals it needs attention.

**Lift:** Scoop a spoonful—it should hold shape briefly before spreading. Too runny? Underfed. Too stiff? Cold or overfed.

**Location:** Move the jar to the warmest spot in your kitchen (near a window or appliance) if activity slows. Consistent warmth matters more than exact temperature.

When Your Starter Calls It Quits (Literally)

Liquid on top? That’s hooch, not a sign of failure. Here’s how to handle it:

  • Stir it in → milder flavor, quicker rise
  • Pour it off, then feed → sharper tang, slower ripening
  • Discard & refresh → if it smells rotten or looks moldy

💧 Common mistake: Using chlorinated tap water for feeds. Chlorine and chloramine suppress wild yeast and bacteria, leading to slow rise and off-flavors.

👉 Avoid it: Let water sit uncovered at room temperature 24+ hours, or use a basic filter. The chlorine gas off, and your starter will show better activity and aroma within 1–2 feeds.

More from Diamond Co.